MERRY AND BRIGHT | MERRY AND BRIGHT | GWEN WRUCK

Hey Creative friends, I’m back on the blog today with some more Christmas inspiration using the ‘Merry and Bright’ collection. For this page, I thought it would be fun to scrap this black and white photo of my daughter and drew inspiration from that sweet little present she has there in her lap.

To start the page, I’ve created my background using the ‘Star Bright’ and ‘Happy Holidays’ pattern papers. I’m going with another central design for this page (I’ve been on a bit of a kick with those of late) To ground my photo I’ve cut out a cut file from CUT to YOU called ‘Pretty Packages‘ nice and large and then backed it. To back the cut file design, I’ve used the ‘A5 Paper stack’ where possible as I wanted the smaller prints of the paper designs.

I’ve added a mat to my photo also using paper from the ‘A5 Paper stack’ and then added stitching around the edge and popped it up on some foam tape for dimension. I’ve also added stitching to the edge of my background for a sweet detail.

For the title of my page, I’m using the ‘Merry and Bright’ element below which has been fussy cut from the ‘Oh What Fun’ pattern paper. This pattern paper has so many fun elements on it you can use to embellish your pages and I’ll be adding some more from this one as well which you will see below.

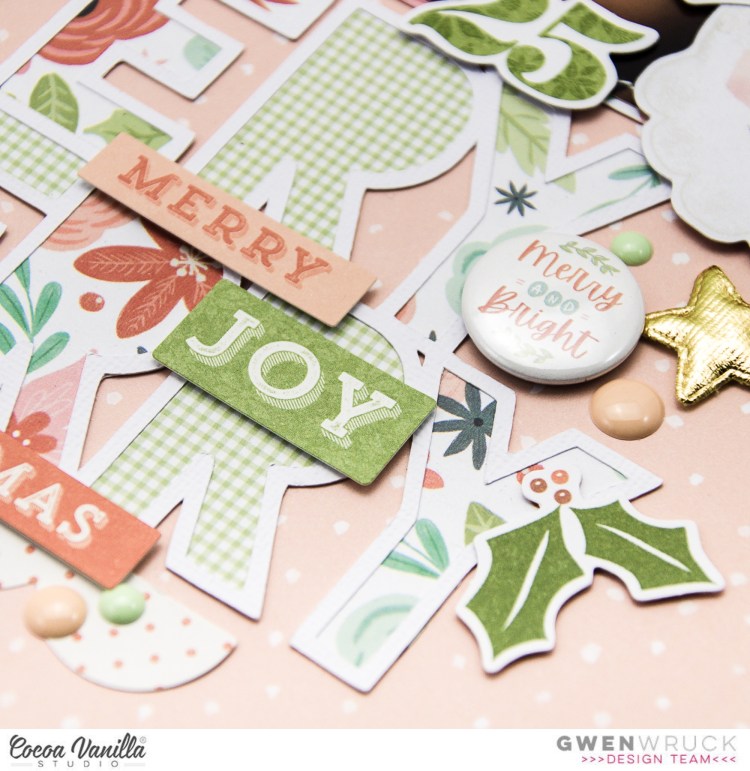
With my title and photo locked into position, it’s time to embellish. For this, I’ve taken floral pieces from the ‘Die Cut Ephemera’ pack as well as a Flair button. I’ve also added in a cute banner piece with Holly on it (shown above) which was cut from the cut-apart sheet.

I’ve also added in two of the ‘Gold Puffy stars’ from the collection and some Enamel Dots which are from the ‘Tis the Season’ collection.

To finish the page, I’ve taken a little dive into my stash and found a ‘Woodies button’ from the ‘Free Spirit’ collection as well as some typed sentiments from the ‘Colour Me Happy’ Collection and another Wooden Veneer piece that says ‘memories’. I have been on a bit of a stash busting kick as well of late so it was nice to get a few older pieces into this layout and mixing and matching them with brand new supplies.

You can also watch me create the layout below:

I hope you are getting some creative time at the moment, I know it can be a busy season. If not, be sure you’re taking lots of photos! xo

Until next time,

OH WHAT FUN | MERRY AND BRIGHT | GWEN WRUCK

Hi Creative friends, I’m back on the blog today with a new share for Cocoa Vanilla Studio using their brand new ‘Merry & Bright’ collection. For today’s share, I’m working with this picture of me! This one was taken on a Christmas cruise we did a few years back.

It’s been a while since I’ve scrapbooked a photo of myself, so it was definitely the inspiration for the page. I knew I wanted to go with a vertical design and thought it might be fun to include this Christmas Tree Cut File by CUT to YOU. (It’s called Whimsy Woodland). The idea is that both the tree and the photo run vertically and draw your eye up and down the page.

I’ve started by backing the tree in the ‘Star Bright’ pattern paper. I’ve also used this paper as the background of my page. For the trunk of the tree, I’ve used the ‘Seasons Greetings’ pattern paper and I’ve also used that as a feature border around the edge of my background. I almost always add a border to my pages, I love how it finishes the edges off and am always sure to add stitching for extra detail.

I’ve backed my photo with a cut candy stripe from the ‘A5 Paper Stack’ and mounted on foam for dimension. I’ve added stitching to it as well which you can see below.

For the embellishments, I’ve decided on one main cluster in the top left-hand corner of my photo. I’ve used a mix of Die Cuts from the ‘Ephemera Pack’, some cut apart elements from the ‘Oh What Fun’ pattern paper some fussy cut florals from the ‘Joy to the World’ pattern paper and a flair button.

I also decided to add some cute decorations to the tree. For this, I’ve used some more fussy cut florals from the ‘Joy to the World’ pattern paper and some die cut ornaments from the ‘Ephemera Pack’. All finished off with a star from the ‘Puffy Gold Stars’ pack.

I’ve also made a YouTube video of my layout process which you can watch here.

Until next time,

MISS THIRTEEN | GWEN WRUCK

Hey there Creative friends! I’m back with you today for some more Scrapbook inspiration. I have a fun share of my Miss Thirteen for this one. This photo was taken on her 13th birthday and I just adore that sweet pose. I’m using Pebbles Inc ‘Girl Squad’ for this layout a fun and funky collection for teen girls. I’ve teamed it with the ‘Sweetheart‘ cut file which I’ve left open to create a fun background layer.

Here’s a closer look at the ‘Sweetheart‘ design:

To begin my page, I’ve created my background by combining two pattern papers, I’ve gone with a bright colour scheme and decided on adding some pops of black as well. Before adding my stitching to the edge, I’ve layered in the cut file (cut on white card-stock) and purposely run it off the edge of the page.

I had very limited paper choices in this collection, so I’ve used the 6×6 pattern paper to create some paper layers in my background. I’ve backed my photo with the same pattern paper as my background edge to make it pop but softened it with a layer of vellum.

Next, I’ve pulled a title sentiment from the ephemera pack, I just love the quote ‘Happy Girls are the Prettiest’, it’s so true. At this stage, I thought it might be my title, but I do end up adding another one.

Next, I’ve added in some more of the die cut ephemera elements including some floral pieces, so heart die cuts and the cutest pair of sunglasses, this really is a fun collection.

It was at this point that I thought the page needed a little more detail, so I created a couple of paper bows using my Sizzix machine. I’ve had this bow die for the longest time, it is so handy and a great way to use up paper scraps. I’ve also added here my title ‘Miss Thirteen’ using some Thickers from my stash. I chose black to help pull all of the darker element on the page together. I don’t work a lot with black but just love how it pops on this page.

AND, that is the page complete. Thanks for popping by today creative friends, I hope this one has inspired you to get creating. As always, I love seeing what you make so be sure to tag me on social.

Until next time,

VERY MERRY | MERRY AND BRIGHT | GWEN WRUCK

Hi Creative friends, I’m back on the blog today with a new share for Cocoa Vanilla Studio using their brand new ‘Merry & Bright’ collection. For today’s share, I’m working with this sweet picture of Miss C wayyy too excited about Christmas M&M’s. On the blog this week the Design Team have been challenged to mix an older collection with a new one, so I’ve decided to mix the new Christmas collection (Merry & Bright) with Tis the Season. I just love how these two collections came together.

The design for my page is a central one which started with this title cut file by CUT to YOU called ‘Very Merry‘. I’ve positioned my photo on top taking care to ensure everything is nicely centred.

Then, working with the larger ephemera pieces first, created three embellishment clusters, one in the top left hand corner of the photo, one in the bottom right hand corner of the photo and one centred, at the bottom of the page. I’ve started with the large Santa die cut element from the ‘Ephemera Pack’ and mixed and matched ephemera pieces from both collections.

Here you can see the die cut piece ’25’ from the ‘Tis the Season collection’, sitting next to the Santa and Holly elements from the ‘Merry & Bright’ collection. I just love how I can use up those left over pieces of the older collection and give it a fresh new look with the new one.

In the top and bottom clusters, I’ve also added in two of the gold ‘Puffy Stars’ from the ‘Merry & Bright’ collection. These are a great textured piece to add to a layout and are the perfect shade of gold.

You can also see here that I’ve added in a ‘Flair’ from the ‘Flair pack’ as well as some Enamel Dots, these are from the ‘Tis the Season’ collection.

I’ve also made a YouTube process video which you can watch below.

I hope you have enjoyed seeing how this page came together. Be sure to join the Cocoa Vanilla Studio Facebook group to see even more inspiration and ideas for using this collection.

CHRISTMAS MORNING | MERRY AND BRIGHT | GWEN WRUCK

Hi Creative friends, I’m back on the blog today with a new share for Cocoa Vanilla Studio using their brand new ‘Merry & Bright’ collection. For today’s share, I’m working with this sweet picture of Miss C on Christmas morning. The colours in the collection were the perfect match for this photo including the gold of the puffy stars. So fun right?!

For the design of this page, I wanted to keep things pretty clean and simple so decided on a centred design with my photo on the left and a large title on the right. The title is a cut file from CUT to YOU which I have backed with papers from the paper stack. I’ve placed these elements onto the ‘Happy Holidays’ pattern paper and then added a frame using the ‘Jingle All the Way’ pattern paper. I love the sweet candy stripe as a border here.

I’ve mounted my photo with the ‘Oh Christmas Tree’ pattern paper, it’s the sweetest shade of green ever! I’ve also added my signature stitching here for added detail.

With the photo and title elements done, it’s time to have some fun adding the embellishments. The embellishment pack for this collection is full of really fun die cuts. For interest and dimension I’ve raised some of them up on foam tape, its a cheap and effective way to give paper die cuts a more layered feel.

For the page, I’ve created three main embellishment clusters, one in the top right hand corner of the photo, the second along the right hand edge of the photo and the third near the ‘R’ in my title ‘DECEMBER’. The three clusters help draw the eye around the page.

I’ve finished the page off with a flair from the ‘Flair pack’ as well as three of the super cute gold puffy stars. These are so fun for Christmas pages AND as it turns out, the perfect shade of gold to match the tinsel on our tree!

Here’s one more close up of the details including the sweet tree die cuts from the ‘Ephemera Pack’.

Thanks for popping by today, I hope you enjoyed seeing the details of my layout and if you haven’t already be sure to check your local store for this collection, it really is beautiful!

I’ve also created a YouTube process video for this page so if you’d like to see how I put it together, you can watch it below.

error: