HELLO SUNSHINE | ENDLESS SUMMER | GWEN WRUCK

Hi Creative friends,

I’m back on the blog today for Cocoa Vanilla Studio with a stash busting share for you featuring the ‘Endless Summer‘ collection.  Whilst this collection is from a while ago now (2016), I still really love the soft tones in it and the sweet icons, they are perfect for documenting beach photos; these taken of my daughter many years ago.  I have quite a few embellishments for this line in my stash so I thought it would be a great opportunity to get some of those used up as well!

The idea for the page was to create a landscape of sorts, with my photos sitting towards the bottom of the page and the top portion of the page being a pretty summer sky.  I’ve used the ‘Blue Skies’ pattern paper for my background and then created a frame with the ‘Sun Bleached’ ombre pattern paper.  I’ve used this paper to create photo mats for my photos as well.

For a fun element to add to my sky background, I’ve cut two paper kites using a cut file from CUT to YOU called ‘Paper Kites‘.  I’ve backed these in the ‘Sun Bleached’ pattern paper as well as the ‘Aloha’ pattern paper, a fun tropical floral print.  I’ve added some stitching detail to really make them a feature of the design.

My photos also have a stitched border added for extra detail and they run along the bottom of the edge of the layout.  I wanted them to feel grounded against my background.

With the photo and large cut file elements in place, now I get to audition the embellishments in the collection.  I noticed at this point that I had a lot of little sentiments to work with from the ‘Die Cut Ephemera’ pack as well as the ‘Accessory Stickers’.  I even had some that had been fussy cut from the ‘This and  That’ pattern paper.  I also had some of the ‘Flair Buttons’ in my stash and am happy to have included two on this layout.

Thinking about the way the eye will flow from the top of the page down to my photos and across to the left, I have nestled in elements along the left hand edge of my paper kites.  I’ve also added a longer sentiment at the bottom of the page to balance things out and help that bottom section feel more grounded.  Here you can see how the cloud icons in the background pattern paper are matched to the flair button.  I love this layered look.

I’ve then added in a floral sticker from the ‘Accessory Sticker Sheet’ (which I cut in half) as well as some other round elements to soften the look of the page and add more interest.  The different sized round elements really add to the dimension of the page as well.  Lastly, I’ve added in two of the die cut butterflies from the ‘Accessory Sticker Sheet’ as well as a couple of ‘Enamel Shapes’ as a last finishing detail.

I have made a YouTube process video for this one which you can watch here:

I hope this layout inspires you to dive into your stash and get creating!

Until next time,

GOOD TIDINGS | GWEN WRUCK

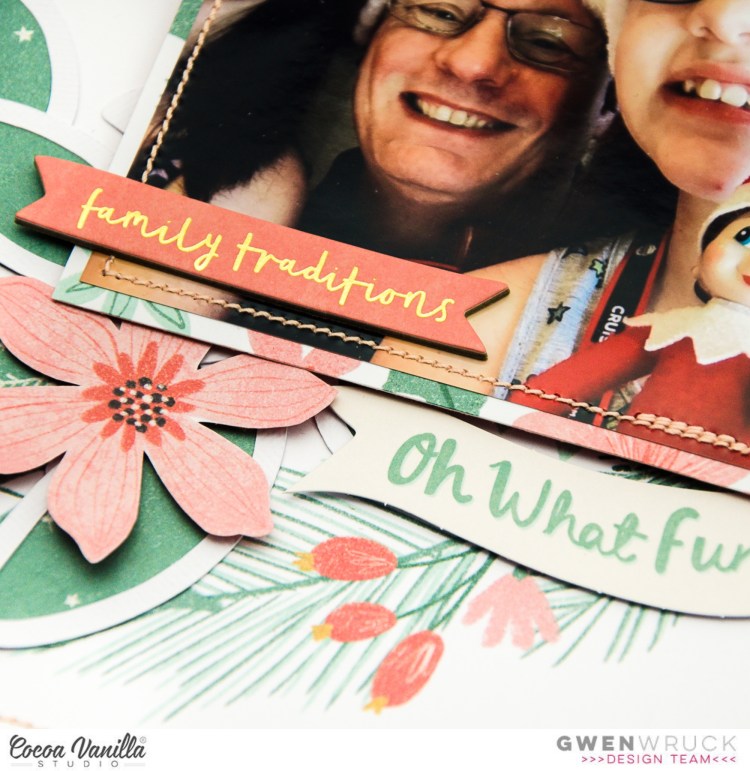
Hey there Creative friends! Gwen back on the blog today with some more scrapbook inspiration for you. Today I’m creating with another of the exclusive designs available for our CUT of the MONTH club members, this one is called ‘Triangle Crystals’ and is available now in the members area of the website for immediate download. Not one of our members yet? Now’s the time to join, for $1.50 per month, you can grab this new exclusive as well as October’s for a short time only, sign up here.

Onto the layout 🙂 I was super keen to get started on a Christmas scrapbook idea I had, using the design to give the feel of Winter. These triangles could be a geometric pattern, but for my layout I wanted them to mimic snow or ice.

I’ve backed the entire file with one piece of pattern paper and then added that to a framed background. I’ve then gone ahead and added a bunch of stitching to the layout. I just love adding stitching to my projects, it adds a really lovely texture and hand made feel to them. I’ve then mounted my photo and added more stitching around the edge.

Next it was time to add in some embellishments and paper layers. I’ve added lots of bits and pieces under my photo and built out the right hand side of the layout with embellishments. To balance this out, I’ve added a smaller embellishment cluster to the bottom left hand side of the page. This Pink Fresh collection has so many lovely elements in it, I love mixing and matching them in my clusters.

I’ve also added in some sequins from ‘Spieglemom Scraps‘ – these snow flakes are the cutest!!! We don’t get snow where I live so this photo taken on a Christmas vacation was the perfect page to use them up on and I just love how they finish off the page.

If you’d like to have a layout just like this one and would like more details, I’ve made a YouTube process video which you can watch here:

A reminder too, that this design is only available as part of the CUT of the MONTH club and will only be available for a short time, so if you love it, be sure to sign up and download it today. 

Until next time,

SUMMER LOVE | SUNKISSED | GWEN WRUCK

Hi Creative friends,

I’m on the blog today bringing you some fun Summer themed inspiration.  My layout today features the beautiful bright ‘Sunkissed’ collection and I’m documenting a photo of my daughter on the beach at a recent family holiday.  I was really keen to use the deep blue of the ‘Bright Side‘ pattern paper as my background for this one to draw out the blue in the ocean in my photo.  I’ve teamed it with some of the pretty florals in the collection for a super fun bright and happy page.

To begin the layout, I’ve created a frame for my background using the ‘Sunny Days‘ pattern paper to layer onto of the ‘Bright Side‘ paper.  I’ve also added a stitched border for extra detail.

Next, I’ve backed a cut file from CUT to YOU using the two ombre style pattern papers in the collection ‘Summer Lights‘ and ‘Good Vibrations’.  I’ve used the floral ‘Growing Wild‘ paper in the rainbow section of the cut file as well as the pink exclusive pattern paper that is in the A5 paper stack.  I’ve gone with the more subtle prints here because my background has stripes and I’m teaming it with the florals.

I’ve also used the ‘Good Vibrations’ pattern paper to create a photo mat and then raised my photo on foam for dimension.  I’ve centred the back cut file on the page and now it’s time to add the pretty embellishments.

Starting with some fussy cut florals from the ‘Growing Wild‘ pattern paper, I’ve layered these both under and on top of the cut file.  I’ve mixed these with die cut florals from the ‘Die Cut Ephemera Pack‘ for added layers and to build out the embellishment clusters.  I also pulled out the fun thongs die cut to add to my page.

Next up, I’ve added in some elements from the ‘Accessory Sticker Sheet‘ including the round element at the top of the page that says ‘Fun in the Sun’.  I’ve also included in my floral clusters some of the ‘Wooden Epoxy Buttons‘ and a cute pair of sunglasses from the ‘Puffy Sticker Sheet‘.

The tile for my page has come from the ‘Glitter Foam Title Stickers‘  I’ve combined the word ‘Summer’ and ‘Love’.  As I’ve applied them to my page, I have bent them slightly to allow them to follow along the line of the rainbow.  I’ve also added a couple of the sweet heart elements from this sheet to my clusters for an added little pop of sparkle.  These were really easy to position and I love the dimension this adds to the page.

I finished up the page by adding in a few small fussy cut florals from the ‘Growing Wild’ pattern paper.

I’ve also made a YouTube process video for today’s page which you can watch here.

Until next time,

BEAUTIFUL LIFE | DAYDREAM | GWEN WRUCK

Hi Creative friends,

Gwen on the blog today excited to be here with a new share.  My layout features the Daydream collection which I’ve used to document a sweet photo of my daughter on her 13th Birthday.   I’m working with a black and white photo for this page so the soft colours in this collection (especially the greys and blues) were really inspiring to me.

For the background of my layout, I decided on the ‘Garden Variety‘ pattern paper.  I love working with a pattern paper background and wanted something a little darker for my background on this page.  I’ve decided to work with a large background style cut file and a dark pattern paper for the background will really help it pop!  I’ve backed this one from CUT to YOU called ‘Triangle Pinwheel Background‘ with the ‘Daisy Days‘ paper, I love the sweet little flowers on this paper.

I’ve centred the cut file onto the background of my page and then added some machine stitching.  For the embellishment clusters, I’m going with 3 clusters for this page.  The main one will feature my title and will run along the left hand side, and my photo will balance that out and run along the right hand side.

Here you can see I’ve mounted my photo on foam for dimension and also added some stitching around the edge.  I’ve also added stitching to the cut file design.  I love adding stitching, it’s a fun little detail that gives a really sweet look to the page.  You can also see here my title and largest embellishment cluster.  I’ve used die cut pieces from the ‘Die Cut Ephemera‘ pack as well as stickers from the ‘Accessory Sticker Sheet’ and a sweet ‘puffy heart‘ in each cluster.

My other two embellishment clusters will be smaller and they will form a visual triangle (with my photo in the middle).  They will also include elements from the Accessory Sticker Sheet and Die Cut Ephemera packs.  I’ve also added in a coordinating flair from the collection.

Next, I’ve added are some fussy cut butterflies from the ‘All A Flutter‘ pattern paper.  I’ve raised these on foam for dimension, they look as though they are about to fly right off the page.  Lastly I’ve added a few of the typed sentiments from the ‘Accessory Sticker Sheet’ as a final touch on the page.

I’ve also made a YouTube video which you can watch here:

Thanks for popping by today, I hope you have enjoyed seeing the scrapbook process for this layout.

Until next time,

HOME IS WITH YOU | THESE DAYS | GWEN WRUCK

Hey Creative friends,

Gwen back on the blog today with a new scrapbook layout idea to share for Cocoa Vanilla Studio.  For this page, I’m playing along with the monthly challenge mood board.  Pop over to the Cocoa Vanilla Studio Facebook group for all the details.  I’ve been inspired by the colours in the mood board as well as the vertical stripes in the top middle image.  I’m also always inspired by sweet florals.  I’m scrapping a sweet little photo of my daughter and I from a few years ago.  The ‘These Days’ collection was the perfect colour match for this photo, I adore the soft warm tones in this collection.

To begin my page, I’ve created a background with white card stock from my stash.  I’ve then created a frame using the ‘Daybreak’ pattern paper. I’ve added stitching in a pretty shade of peach.

Next, to create a vertical area on my page, I’ve cut a cut file from CUT to YOU called ‘Concentric Hearts‘. I’ve cut this and then simply added that down the centre of the page, this will form a base for my photo and embellishments to sit on.  

I’ve mounted my photo using the ‘Wall of Fame’ pattern paper and raised it on foam.  I’ve also fussy cut out a bunch of the florals from the ‘Home Grown’ pattern paper.  I’ll be using these as sweet little embellishments on my page.

Next, I’ve gone ahead and created three embellishment clusters, the main one will include the title for the page which has come from a die cut element from the ‘Die Cut Ephemera’ pack.  I’ve also fussy cut out some of the butterflies from the ‘Take Flight’ pattern paper.

The two smaller embellishment clusters will help the eye flow across the page, one will be above my photo and the other one to the right of my photo.  Each embellishment cluster will include several elements from the collection including die cuts, typed sentiments from the ‘Accessory Sticker Sheet’, ‘Wood Epoxy Buttons’ and sweet gold ‘Puffy Hearts’.

I love making pages like this one, it’s so fun to just play with all of the elements in the collection, mixing and matching them until the clusters form.  I’ve also included some of the floral pieces from the ‘Die Cut Ephemera’ pack as a base for my cluster.  They are a great starting point.  I’ve mixed these with those fussy cut floral pieces I mentioned earlier.

I’ve also made a YouTube video for you for this one which you can watch here:

Thanks for popping by today,