HOME IS WITH YOU | THESE DAYS | GWEN WRUCK

Hey Creative friends,

Gwen back on the blog today with a new scrapbook layout idea to share for Cocoa Vanilla Studio.  For this page, I’m playing along with the monthly challenge mood board.  Pop over to the Cocoa Vanilla Studio Facebook group for all the details.  I’ve been inspired by the colours in the mood board as well as the vertical stripes in the top middle image.  I’m also always inspired by sweet florals.  I’m scrapping a sweet little photo of my daughter and I from a few years ago.  The ‘These Days’ collection was the perfect colour match for this photo, I adore the soft warm tones in this collection.

To begin my page, I’ve created a background with white card stock from my stash.  I’ve then created a frame using the ‘Daybreak’ pattern paper. I’ve added stitching in a pretty shade of peach.

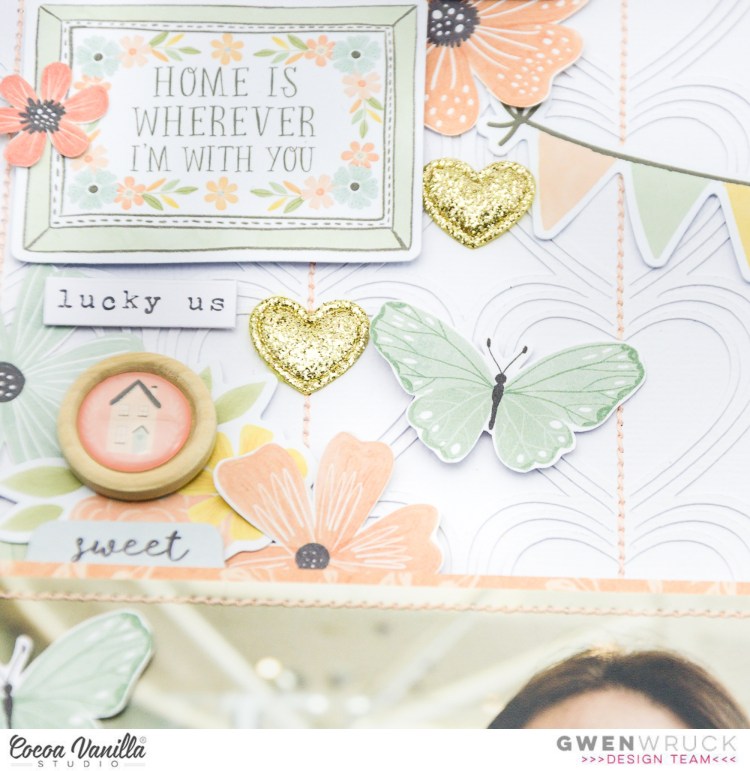
Next, to create a vertical area on my page, I’ve cut a cut file from CUT to YOU called ‘Concentric Hearts‘. I’ve cut this and then simply added that down the centre of the page, this will form a base for my photo and embellishments to sit on.  

I’ve mounted my photo using the ‘Wall of Fame’ pattern paper and raised it on foam.  I’ve also fussy cut out a bunch of the florals from the ‘Home Grown’ pattern paper.  I’ll be using these as sweet little embellishments on my page.

Next, I’ve gone ahead and created three embellishment clusters, the main one will include the title for the page which has come from a die cut element from the ‘Die Cut Ephemera’ pack.  I’ve also fussy cut out some of the butterflies from the ‘Take Flight’ pattern paper.

The two smaller embellishment clusters will help the eye flow across the page, one will be above my photo and the other one to the right of my photo.  Each embellishment cluster will include several elements from the collection including die cuts, typed sentiments from the ‘Accessory Sticker Sheet’, ‘Wood Epoxy Buttons’ and sweet gold ‘Puffy Hearts’.

I love making pages like this one, it’s so fun to just play with all of the elements in the collection, mixing and matching them until the clusters form.  I’ve also included some of the floral pieces from the ‘Die Cut Ephemera’ pack as a base for my cluster.  They are a great starting point.  I’ve mixed these with those fussy cut floral pieces I mentioned earlier.
I’ve also made a YouTube video for you for this one which you can watch here:

Thanks for popping by today,

ONE BIG ADVENTURE | THESE DAYS | GWEN WRUCK

Hi Creative Friends,

Gwen back with you on the blog today with a fresh new share for Cocoa Vanilla Studio using the ‘These Days’ collection.  I’ve used it to document a fun photo of my teenage daughter at the beach on a recent family get away.  I’m doing a lot of fussy cutting for this page and have teamed that with a large title for a simple design that came together fast.

To create the background of my layout, I’ve created a frame with the ‘Wall of Fame’ pattern paper and added it to a sheet of Olive green card stock from my stash.  I love the shade of this paper, it screams fall.  I’ve also used it to back the word ‘Adventure’ in my title.  Next, I’ve used the signature floral print in the A5 pattern paper stack to back the word ‘Big’ in my title.  Using the A5 papers for this allows for more of the pattern to show, it really is the perfect scale for backing cut files.  This title design is a cut file from CUT to YOU.

As I was backing the title, I thought I’d extend it with the words ‘with you’.  These have come from the ‘Mini Puffy Alphas’ which are so cute!!  I’ve also added in some stitching here; to co-ordinate with the stitching around the edge of my page and photo.  I love the look of stitching over puffy stickers, it adds a home made touch to the page, texture and detail.

I’ve backed my photo with the ‘Daybreak’ pattern paper in the A5 paper pad and mounted it on foam.  I’ve then gone ahead and fussy cut out a bunch of floral pieces from the ‘Home Grown’ pattern paper.  I’ve added my photo to the left of the layout and then the floral elements down the right hand side of the photo flowing down the page towards the bottom right hand corner.

To further embellish the page, I’ve added in elements from the ‘Accessory Sticker Sheet’ including some typed sentiment stickers which I have mounted with 3D foam for dimension.  I’ve also fussy cut several butterflies from the ‘Take Flight’ pattern paper. *TIP – Fussy cut out a bunch of butterflies in advance to have them ready to add as finishing touches to your pages.  There is a lovely mix of colours to use in this collection.

Lastly, I’ve added in three of the ‘Wood Epoxy Buttons’ around the page.  These add a lovely texture and detail to the design.  They come on a foam pad which you can use for extra dimension, or remove if you prefer a slightly flatter look.

I’ve also made a YouTube process video which you can watch here:

I hope you have enjoyed seeing my process for this layout and it inspires you to get creating with this stunning collection.

Until next time,

LOVE GROWS HERE | GWEN WRUCK

Hey there Creative friends! Gwen back on the blog today with some more Scrappy inspiration and a super fun announcement… Introducing the CUT of the MONTH club! Today I’m creating with the very first exclusive design available for club members only. When you join our CUT of the MONTH club you can simply log into the members area of the website and get access to a fresh new exclusive design every month. I’m creating these designs especially for members only; you won’t be able to find them anywhere else AND they will only be available for a short period of time. If you are not signed up for the design of the month, you will miss your chance to get it forever. If you love CUT to YOU designs, you won’t want to miss this. You can sign up today for full access here and can cancel at any time.

Onto the layout 🙂 I’m on a ‘Back to School’ kick at the moment so it was fun to get this photo documented. I’ve started with the ‘Eucalyptus Wreath‘ design shown above and backed it with pattern papers from Cocoa Vanilla Studio. I’ve gone with a soft green leaf print from the ‘These Days’ collection. I’m using that same print for my layout edge and then a pretty yellow pattern paper from the same collection.

I’ve then positioned my photo along the right hand edge of the wreath, backing it with a small photo mat and adding my stitching. I’ve raised it up on foam as well for dimension. I’ve then gone ahead and fussy cut out some florals from pattern paper. I’m going to use the wreath cut file as a bit of a guide or template to create my floral clusters. A cut file like this one is a really great starting point if you are new to creating floral clusters. Use it as a base and work your layers up from there.

I’ve mixed and matched floral pieces and leaves and added them over the top of my wreath. I’m taking care not to overlap all of the wreath, I’m just looking at filling the design out a little. Some elements are raised on foam, others sit flat to the page. I just keep trialing bits and pieces here and there until I’m happy with how it all looks. Next, I’ve fussy cut out some sweet butterflies from pattern paper and added them to my layout. I add the adhesive to just their centres so that I can bend the wings up a little for dimension.

I’ve also included some die cut elements from the same collection and some sweet typed sentiments which I’ve raised up on foam tape. These are always a nice finishing touch to a page. 

If you’d like to have a layout just like this one and would like more details, I’ve made a YouTube process video which you can watch here:

A reminder too, that this design is only available as part of the CUT of the MONTH club and will only be available for a short time, so if you love it, be sure to sign up and download it today. 

Until next time,

PICTURE PERFECT | THESE DAYS | GWEN WRUCK

Hi Creative Friends,

I’m up on the Cocoa Vanilla Studio blog today sharing a new layout using the ‘These Days’ collection.  For this layout, I’m documenting a fun photo of my daughter recently taken on a Farm Stay mini holiday.  This collection is super sweet and so fun to use for wonderful little moments like this one.  I’m feeling a little bit county-vibes for this layout.

To begin my page, I have chosen a cut file from CUT to YOU, this one is called Floral Banner 3 and then used the ‘A5 Paper Stack’ to back it.  

I’ve started with the banner piece of the cut file. The design was a little longer than A5 so I’ve added paper behind the left and right sides of the banner leaving a gap in the centre, this works out fine as this is where my photo will be placed.  I’ve then used the pretty peach exclusive pattern to back my flowers and a pretty green leaf print for the leaves.  I used this same green pattern paper to back my photo.

**TIP – The prints in the A5 paper stack are perfect for backing cut files and creating thin photo mats as the prints are smaller than those on the 12 x 12 pattern papers. This smaller print allows you to see the design even when using them in small pieces.

To create my background I’ve used the ‘Pretty Posies’ pattern paper for my layout edge and the ‘Neighbourhood’ pattern paper for my background.  The black and white print was a little busy for underneath my cut file, so I’ve added a layer of vellum from my stash to soften it.  I love the look of vellum, it’s such a soft element to add to a page.  I love too how the print of the pattern paper still shows through; very dreamy.

It’s now time to embellish.  I’ve gone with a large cluster (including my title) to the left of the photo and then two supporting clusters, one on the top left of my photo and the other on the bottom right of my photo.  I’ve used pieces from the ‘Die Cut Floral Ephemera’ as well as the ‘Die Cut Ephemera’ pieces to create the layers in my clusters and title.  The die cut piece that says ‘Picture Perfect Moments’ was perfect for my page.

For dimension and texture, I’ve added in elements from the ‘Puffy Stickers’ and three ‘Wood Buttons’.  I’ve finished off the page with several of the sentiment stickers from the ‘Accessory Sticker Sheet’ added with 3D foam adhesive.

I’ve also made a YouTube video of my process which you can watch here:

Thanks for popping by today.  I hope my page has inspired you in some way and you enjoyed my scrapbooking process.

Until next time,

BLOOM | THESE DAYS | GWEN WRUCK

Hi Creative Friends,

Gwen with you on the blog today sharing for Cocoa Vanilla Studio. I have a new layout using the ‘These Days’ collection.  We are doing a bit of a Scrap-lift on the blog this week and I’m super excited to be inspired by a layout created by Laura Alberts.  I’ve included an image below of her layout so you can see all the inspiration I’ve had for my page.

There is so much about Laura’s page that inspires me.  I was first drawn to the frames in her background and their grid like format.  Then I was drawn to her black and white portrait image finished off with a striking black border on her layout.  For my layout, I simply started with those three elements and went from there.  I’ve pulled from my stash the same black and white pattern paper she has used for her outside edge (More than Words Collection – Gossamer) and then teamed it with the latest ‘These Days’ collection.  I’ve also found a black and white portrait photo to use, just as she has.  This one is a photo of me and I thought, why not use it, I don’t scrapbook myself nearly enough 🙂  I know I’m also going to use some butterfly embellishments just as she has in her page.

For the background of the layout, I’m using the ‘Home Grown’ pattern paper.  I love using pattern paper rather than card stock for my page backgrounds, this one is a pretty shade of yellow.  I’ve then pulled out a cut file from CUT to YOU, this one is a lovely mix of floral and frames called ‘Snap Shot with Florals‘.  I wanted to replicate the frames on Laura’s layout here.  I have gone ahead and backed the cut file using the A5 paper pad and then left the frames all open so that my lovely yellow background will show through.

Next, I’ve backed my photo and then fussy cut out a few of the pretty frames from the ‘Wall of Frame’ pattern paper.  I’m going to use these to layer into the frames in my cut file for something different.  This is a great way to give a bit of a backed look to the cut file, without the hard work.  The frames in this pattern paper are super quick to fussy cut out.  I’m using both of these elements taking inspiration from the frames in the background of Laura’s page.

I have positioned my photo to the left of the page so that you can see most of the floral elements in my cut file on the right.  From there, I’ve created three embellishment clusters using lots of elements from the collection.

I’ve featured elements from the ‘Die Cut Ephemera pack’ as well as florals from the ‘Floral Ephemera’ pack.  For the title of my page, I’m going with a sticker that says ‘Bloom where you are planted’ from the ‘Accessory Sticker Sheet’.  I’ve also used the typed sentiment stickers on the bottom of that sheet adding them to my page with foam tape for dimension.

To finish up the page, I’ve added in 3 of the ‘Wooden Buttons’ and they really help draw the eye around the layout as well as adding some lovely texture to the page.

I’ve also made a YouTube process video which you can watch here:

Thanks for popping by today, I hope you enjoyed seeing the details in my layout and that it has inspired you in some way 🙂

Until next time,

error: