Hey there Creative friends! Super excited to be joining you today with some more Scrappy inspiration including a new YouTube process video. I’ve used Jen Hadfield ‘Hey Hello’ papers and embellishments as well as some goodies from my stash! The cut file I’ve featured is the ‘Simply Floral Pendent‘ which I’ve cut nice and large to create a background feature for my page.
You can check out my YouTube process video for it here:
I’ve included a couple of close ups for you here too…
I hope you enjoy the video, be sure to subscribe to my channel and leave me a comment 🙂
Hi Creative friends, I’m back on the blog today with a new share, this one for Cocoa Vanilla Studio. I’m really having a bit of a stash bust at the moment with my CVS products, while I wait for their latest collection to arrive and I’m really enjoying seeing these older products on pages. This project features the ‘More Than Words‘ collection and a sweet photo of my daughter and I, taken a few years back.
For this page, I actually started with the idea to use up some of my stash in this collection and noticed that I had quite a few orange/yellow elements left. I’ve made a stack of layouts with this collection and most of those featured the pretty pinks and greens… so I thought it would be fun to use up some of the darker prints and that pretty peach/orange tone.
Some of you will also know that I’m on a bit of a coloured background kick at the moment so thought I’d start with the ‘Sketch Book’ pattern paper as my background. I’ve then framed it with the ‘Gossamer‘ pattern paper to create a solid border around the edge. I’ve also used this pattern paper to mount my photo along with a small piece of the ‘Effervescent’ pattern paper I had left in my stash. I’m going for a design that runs across the centre of the page so was sure to keep the lines of my background paper running left to right (not top to bottom).
Next, I wanted to build the photo mat and base elements of my page. To break up the peach in the background, I’ve pulled out a cut file, this one called ‘Damask Flower Stack‘ from CUT to YOU and cut two out in white Card Stock. I’ve layered these across the middle section of my page to act as a base for my photo and embellishments.
I’ve then positioned my photo on the left-hand side of the page and began thinking about my title and other design elements. I’ve gone with the title ‘Hello Love’ from the ‘Chipboard Titles‘ in the collection. These are super sticky and great quality and really add a lovely touch to your page. I’ve positioned it to the lower right of my photo.
With the largest elements of my design locked it, it’s time to embellish! I’ve started with some floral and leaf die cuts from the ‘Die Cut Ephemera‘ pack. I’ve just made sure to keep to my warm soft Apricot/Peach tones and Black and White.
I’ve also fussy cut out some butterflies, some from the ‘Collage‘ pattern paper and some from the ‘Gossamer‘ paper I have used earlier. I’ve also filled in the design with some Die Cut title elements and stickers from the ‘Accessory Sticker Sheet’.
Lastly, I’ve rounded out the page with some Enamel dots and a deep dive into my stash to find some ‘Endless Summer’ Woodies. I love the warmth of the wood grain here, perfect for this page.
Thanks for popping by the blog today, I hope you enjoyed seeing this page come together and that it might inspire you to do a little stash busting yourself! If you do, be sure to share it with me in the Cocoa Vanilla Studio Facebook group 🙂
Hey Creatives! I hope you are all well. I’m up on the blog today sharing for Cocoa Vanilla Studio and I’ve dug deep into my stash for this share, using the ‘Wild at Heart’ collection. I paired it with this happy snap of Miss C and myself which was taken a while back while we were just hanging out. I love these pics, so fun and so ‘us’ and they work so well with this sweet collection.
For this page, I was really inspired to use up some of the ‘Chipboard Frames’ from the collection. I had an unopened pack in my stash so pulled them out and set out a plan to layer them onto my page. I just mixed and matched them with my photo until I was happy. At this point nothing is stuck down, I just needed to get an idea of where everything was going to go.
Next, I went about backing my photo. For this, I’ve used the ‘Memento‘ paper and ‘Luscious’ paper, I’ve also added my signature stitching here. I’ve then gone ahead and recreated my design with the photo and the chipboard. Once I was happy with the position of everything, I’ve glued the frames to the photo (not the background) so that everything is in one piece and easy for me to move around.
Now it was time to work on my mixed media background. I’m going for a subtle look here and used some mixed media shimmery spray and the packaging technique, not fussing with it too much, just letting the spray drip a little and move around the page, then set it aside to dry. Once dry, I’ve added my photo and frame pieces on top.
Before sticking everything down, I’ve added in a large die cut doily from the ‘Ephemera Pack’ to the right of my photo as well as a tag from this same pack, sticking out the top edge of my photo. My page is a central design so everything is working from the centre of the page outwards.
It was now time to embellish! I’ve started by fussy cutting out some of the elements from the ‘Fussy Cuts’ paper and pulling pieces from the ‘Ephemera Pack‘ and ‘Accessory Sticker Sheet’. Adding bits and pieces to the main structure of my page. I’ve also used a bow die in my Sizzix machine to create some fun paper bows and added these for dimension and interest. This is a great way to use up paper scraps if you have them.
Next, I’ve added in a flair button from the ‘Flair pack‘, some typed sentiments from the ‘Accessory Sticker Sheet’ and some ‘Enamel Dots’ in gold to add a pop of sparkle. These smaller elements help round out the page and finish it off so nicely.
I hope this page has inspired you to pull out your collection of ‘Wild at Heart‘ and get creating! It’s always great to stash bust a little before a brand new collection arrives! As always, be sure to share in the Cocoa Vanilla Studio community, we love seeing what you make 🙂
Hey Creatives! I hope you are all well. I’m up on the blog today sharing for Cocoa Vanilla Studio and for this week we are having fun and being inspired by a Stars and Stripes theme. I’ve decided to work with stars and was inspired to scrapbook this photo of Miss C from a few years back. I was also inspired by this months challenge mood board which I will also share below.
Here is the challenge board that helped inspire the page:
My page started by pulling out the ‘Legendary‘ collection. I really wanted to use it as I knew it had the blue tones, touches of green and that warm copper type colour all in the mood board and all that would match my photo. I also knew it would work really well with the star theme we have happening and included the die-cut star pieces in the ‘Ephemera Pack‘.
Next up, I grabbed this star cut file called ‘Stars N Stripes’ by CUT to YOU and backed each of the stars alternating the ‘Wild One‘, ‘Outdoors Type‘ and ‘Off Beat’ pattern papers. I’ve also used the dark woodgrain in the ‘Outdoors Type’ pattern paper as my border, adding stitching around the edge for extra detail.
To mat my photo, I’ve used the ‘All Star‘ pattern paper and more of the ‘Off Beat‘ pattern paper for my layers.
I’ve then positioned my cut file onto some foam adhesive and placed onto more of the ‘Off Beat’ pattern paper, this time using the A-side. I just love the look of this mixed media background without any of that messy mixed media work.
With my large cut file and background sorted, it was then time to position the photo and larger title pieces. I am on a kick right now to use all of these titles up and have added another three to this page. I don’ have too many now!! I had to fuss with the position a bit to get them to a place where I felt like they worked. I just kept changing things up until I was happy.
I’ve also added in at this point the two large die-cut stars into my layers and love how they look. It was time to get to the embellishments, I’ve gone with the Flair buttons, some stickers from the ‘Accessory Sticker‘ sheet and a few ‘Enamel Dots‘ to finish off the page.
Thanks for popping by the blog today, I hope my page has inspired you and you are enjoying the ‘Stars and Stripes’ theme this week. I also wanted to mention that I have made a YouTube video of my process for this page which you can watch below. If you are enjoying my scrapping style and would like to see more process videos of the pages I share, then please subscribe to my channel.
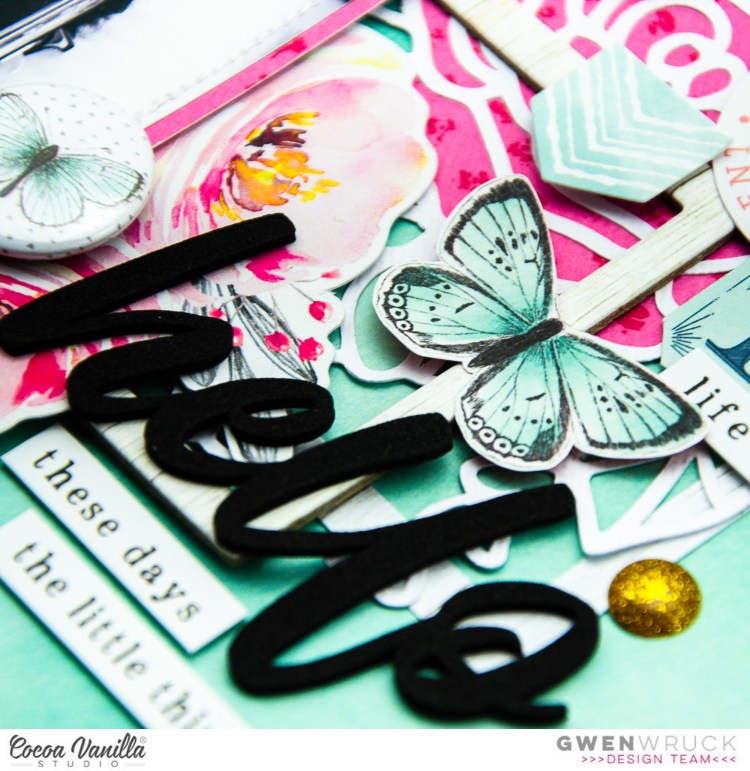
Hey Creatives! I hope you are all well. I’m up on the blog today sharing for Cocoa Vanilla Studio. This week we are having a bunch of fun sharing Scraplifts from challenge entries in the recent International Scrapbooking Day celebrations. There were so so many wonderful entries, so it was super hard for me to choose one to Scraplift; so so much inspiration. In the end, I decided on this one by Kim Arnold.
What drew me to her page was the landscape design with room for multiple photos (which I sometimes struggle with) and her sweet floral clusters. I also loved how she added that frame and I have a stack of these in my stash so thought this was a nice opportunity to use one up. I also love that pop of black in her title, the butterfly and in her photo mats so I’ve drawn inspiration from that as well. Here is my page….
Even though I had her ‘scrap-lift’ to work with, I wanted to make the page my own, so to start, I pulled out a delicate cut file from my stash. This one is called ‘Wedding Bouquet‘ from CUT to YOU. I will admit, I totally cheated here and used it as the base for my page design, instead of adding the mixed media that Kim used. Whist I love it on her page, I’m not super confident with getting messy so I stuck to what I know and love.
I went with the ‘Garland‘ pattern paper for my background for my page as I wanted something that my white cut file could be layered over and still stand out. Next up, I went about backing my photos, for this, I’ve used the ‘Unscripted‘ pattern paper, I’ve also used this to back just the centre flowers of my cut file.
Working with her design, I’ve pulled out a frame from the ‘Bohemian Dream’ collection. I’ve positioned my cut file base, photos and the chipboard frame in keeping with her layout composition.
It was now time to work on the embellishment clusters. For this, I’ve simply pulled out a stack of elements from the collection including this round element from the ‘Ephemera Pack‘ as well as fussy cutting some butterflies from the ‘Lacewing‘ paper.
I’ve also included florals from the ‘Ephemera Pack‘, stickers from the ‘Accessory Sticker Sheet‘, a bow, AND a flair button from the ‘Flair Pack‘. For my title, I’ve gone with the ‘Hello’ sentiment from the ‘Foam Title Stickers Pack‘. This part of the page was the easiest and most fun. I simply kept her main design elements in mind and positioned similar things in similar positions.
To finish the page, I felt like it needed a hint more of that pop of black, so I’ve gone with the ‘Natural Beauty‘ pattern paper to frame my page. To finish everything off, I pulled some of the gold ‘Sparkle Enamel dots‘ from the ‘Wild At Heart‘ collection. I just love these ones, so pretty and sparkly!
Thanks for popping by today and a special thank you to Kim Arnold for the inspiration for this page and everyone who played along with the challenges over the INSD weekend. It really was so fun to see everyone’s creations!