SWEET LOVE | CUT TO YOU

Hi Creative Friends,

I hope you all have a creative weekend ahead planned.  I’m up on the CUT to YOU blog today with a new share, a sweet page that features my hubby and daughter.  This photo was actually taken very recently on a family lunch for my recent birthday.  Part of my birthday gift request was a quick family photoshoot so you’re sure to be seeing more of these photos in upcoming projects.

The design of the page for this one started with the cut file – this one is called ‘Floral Bouquet Set‘.  This was released recently and being the floral lover than I am, I just had to use it!  I’ve cut it out quite large as I had planned for it to be the main element of my page and then went about backing it.  I’ve gone with quite plain pattern papers and blocked the colour on the leaves and petals.

With that done, I then just went about positioning the cut file and my photos on the page.  I was really keen to get both photos on this one, something I don’t do a lot and would like to do more!  I love how they both tell the story of their sweet relationship.  I just kept shuffling things around until I was happy with the position of everything.

I’ve positioned the bottom cut file (the largest one) flat on to my background and then raised on foam the second cut file piece.  I love how I now have beautiful layers in my cut file and lots of details on my page.

I’ve also raised the photos up with some foam for added dimension.

Next, I’ve added in my title.  I wanted to pull a pop of black from the photos into my embellishment features and found this chipboard word ‘sweet’ in black that was perfect.  I also found a bold white and black word ‘love’ so my title has become ‘Sweet Love’.    This is one of the things I really love about working with cut files, you can pull older embellishments from your stash that are not quite enough to make a page and stretch them into a full layout.  The cut file pulls the few extra elements together.

I’ve also pulled from my stash some sweet puffy hearts, some photo corners, and a soft pink bow.  I’ve also used some Epoxy Flairs from Scrappin Happy Studio and I just love how they finish off the page. I love this sweet page and it actually came together pretty fast, so I hope it inspires you in some way and as always, I really do love seeing what you make so please keep sharing your projects with me!

Thanks for popping by today,

Until next time,

LITTLE MOMENTS | UNFORGETTABLE | GWEN WRUCK

Hi Creative Friends,

I hope you are all well! I’m back on the Cocoa Vanilla Studios blog today with a new share using the stunning ‘Unforgettable’ collection.  This is the fourth page I’ve made with this collection and the more I use it, the more I just love it!  My page features a photo of my daughter the day before heading off to her first school camp.  We were both super nervous about the adventure ahead and I had been speaking with her about enjoying the little moments at camp and remembering that these are moments she will look back on and truly treasure, even though right now it didn’t seem that way.

I started the page with the idea of creating a central paper stack for my photo and working outward from there.  For this, I’ve used the butterfly quad element from the ‘Pretty Bits’ pattern paper.  I’ve teamed this with the ‘Sprightly’ paper which I’ve used as an edge for my layout as well as a double mat for my photo.  **TIP –  If you want a double mat for your photo and aren’t sure which two papers to use, go with an A and B side of the same paper, they were made for each other 🙂

With my photo mat sorted, I positioned it overlapping the butterfly quad element (making sure to fussy cut out the two butterflies that were not showing for later) and centered everything onto a plain white card stock background.  Now, I could go through all of the pretty elements of the collection to fill out my page.

I find it is always best to work with larger elements first and then move onto the smaller ones, so started with the pretty floral die cut from the ‘Die Cut Ephemera’ pack.  I’ve used one of the largest pieces here and then added smaller pieces on top using foam tape for a layered effect.

Next, I’ve added in the Orange fussy cut butterfly that I had saved and a smaller one from the ‘Die Cut Ephemera pack’.  There is still another Grey butterfly that I had fussy cut, that one will be added to a new project.  I’ve also added in here a large sticker from the ‘Accessory Sticker Sheet’ and a medium-sized die-cut Camera.  I’ve grabbed a flair button and added that here as well.

I was really happy with the ‘bones’ of my page now so it was time to move onto smaller embellishments.  I’ve pulled out several stickers from the ‘Accessory Sticker Sheet’ and positioned them on my page.  There were quite a few that really suited the sentiment for this layout and I loved how the colours matched perfectly.  Lastly, I went about adding a cute bow from the ‘Tassles and Bows’ pack as well as some Enamel dots and the page was complete.

Thanks for popping by today to see my latest project, I hope it inspires you to get creating with this beautiful collection.

Until next time,

TOGETHER FOREVER | CUT TO YOU

Hi Creative Friends,

I’m up on the CUT to YOU blog today with a new share using my very first Travelers Notebook cut file!  I’ve made a stack of these for the TN peeps out there, (you can shop them here) and always said, these are great for scrapbooking too and today I thought I’d show you!  This photo was taken at my wedding 18 years ago and from memory is the 2nd or 3rd wedding photo I’ve scrapbooked.

I started with the ‘TN Together Documented‘ cut file and resized it quite large knowing I was working with a 6×4 photo.  I’ve backed the design with pretty paper from Cocoa Vanilla Studio ‘Midnight‘ Collection, it really is beautiful for Wedding photos.  I went with a darker paper to fill the hearts in the design and something lighter and soft for the letters.

I’ve then backed my photo with just a single mount for this one and stitched around the edge as I normally would.  I’ve also added 3D foam behind for added dimension and then decided on the position of the cut file and the photo.  I like to nut out this part of the design early so that I have a direction for the page.

Next up, I’ve pulled out some co-ordinating embellishments, most of these from the Die Cut Ephemera pack of the collection as well as my foam Thickers.  I decided to add to the ‘Together’ in my cut file to make the title ‘Together Forever’.

I’ve now added in some more floral elements and this cute navy bow.  I’ve worked in my usual loose, flowing clusters to help draw the eye around the page and finished it off with this sweet flair from Felicity Jane.

And that was the page done AND as you can see, even though it is a Traveler’s Notebook design as such, it is also perfect for layouts.  The rectangle format would also work super well with the 9 1/2 x 11 size, so if you love those, the TN designs are for you!

Thanks for popping by today,

Until next time,

CHRISTMAS MEMORIES | TIS THE SEASON | GWEN WRUCK

Hi Creative Friends,

I hope you are all well! I’m back on the Cocoa Vanilla Studios blog today with a share for ‘Throwback Thursday’.  I love these features because I get to dive deep into my stash and create with some of my all-time favorite collections.  I’m also playing along with the latest challenge over as CSI Scrapbook Challenge Number 297 which Cocoa Vanilla Studios is sponsoring.  So, if you fancy yourself some free CVS, be sure to play along!

The moment I saw the Scene from the challenge I immediately thought of the Tis the Season collection.  The soft peach and coral tones and the fall ‘vibe’ of the image really appeal to me.  I also pulled inspiration from the trees in the picture, with many reminding me of pine or Christmas trees so I decided on creating a Christmas themed page.

With the collection and theme of the page decided, I pulled out a ‘Christmas themed’ cut file, this one from Cut to YOU called ‘Christmas Tree Row‘.  I’ve backed the design with a selection of papers from the collection including ‘All is Bright’ and ‘Holly Jolly’.  This collection is a few years old now, so I don’t have a lot of papers left so the cut files provided a great way to use up the scraps and stretch the supplies I had.

I’ve mounted my photo with the ‘Very Merry’ pattern paper, stitched around the edge and mounted on foam for dimension.  I’ve then run the tree cut files and my photos across the center of my page to nut out the page design.

Once I had the trees and photo positions locked in, I added some gesso to my white cardstock base and added in some light watercolor in a matching tone to the collection.  I really wanted to keep the page in the Coral and Peach tones in keeping with the mood board and would add just add a few pops of the green here and there from my embellishments.  Once my watercolor was all dry, I’ve added my tree and photo elements back on top.

Next, it was time to play with the embellishments.  I’ve pulled out lots and lots of elements from the ‘Ephemera Pack’ as well as the ‘Enamel dots’, ‘Accessory Sticker Sheet‘ and a white bow from the ‘Bitty Bows’ pack.  (You can still also get the ‘Alphabet Stickers‘ from the collection here). The cream star elements are also Cocoa Vanilla however I couldn’t see them available any longer, so you’ll have to dig deep into your stash to see if you have those.

I simply auditioned all of the elements around the photo and tree cluster until I was happy, locking in larger elements first such as the floral pieces and my title and then working with the smaller pieces to fill in the gaps.  I love making layouts like this, full of lots of pretty details.  I just keep playing with pieces until I am happy and call it done.

Thanks for popping by today to see my latest project, I hope it inspires you to get creating and play along with one of the challenges over at CSI this month.  As I mentioned, you could win yourself some Cocoa Vanilla Studios just for joining in!

Until next time,

‘You Are Special’ Digital Download FREEBIE

Hi Creative Friends,

Thanks so much for popping by the blog today.  Here are the details on how to grab your ‘You are Special’ FREE digital Cut File design.  Simply click the image below or HERE to sign up and get instant access!

I’ve also included below a tutorial so you can get working with the file straight away.

This page is created with Cocoa Vanilla Studios stunning ‘Unforgettable’ collection.

Cut files by:

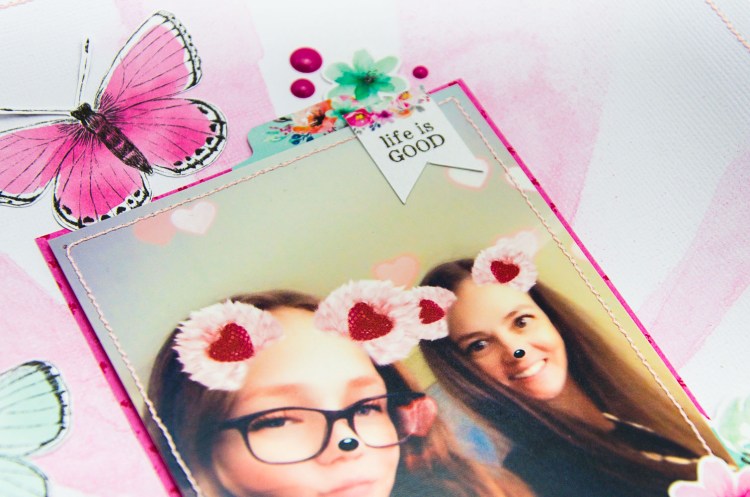
I began the page with some fussy cutting, as I mentioned, I do sometimes struggle knowing where to start with oh so many pretty choices, so a bit of fussy cutting is a great way to ease myself into it.  I fussy cut out the four butterflies from the ‘Pretty Bits’ pattern paper.  I then decided on my photo and went to the ‘6×8 inch paper stack’ and mounted it with the bright pink pattern ‘Unscripted’.

Next, I decided to use a plain white cardstock for my base but wanted to add some colour.  I’ve taken a stencil and added some water-colour spray.  Once dry, I’ve chosen a cut file, this one from CUT to YOU for my title.  Yes, there are the most divine foam title stickers in the collection, but I’m currently hoarding those!  Again, I’ve used the paper stack to alternate pattern papers to back each letter.  I love that for this collection the papers are not glued together into a pad, they are all individual sheets so it is super easy to pull them all out to audition each design before you commit to anything.

Once my cut file was all backed and looking lovely, I’ve position onto my background with some foam tape.  Now it was time to look through all of the pretty embellishments.

I’ve started with the Ephemera pack, which has 65 pieces, including florals and butterflies and banners and auditioned EVERYTHING, it is all so so nice! As well as the ‘Bows and Tassles’ pack, there was no way I wasn’t going to include a bow on this first page!  I’ve also matched the ‘Enamel dots’ from the collection with the pop of the pink in the pattern paper.

I thought it best to lock in the position of my large fussy cut butterflies first and then work in the smaller elements.  I did end up with just the three for this page. I did find a matching butterfly from the ephemera pack which was the perfect fit as it was quite a bit smaller than the others.

I’ve added in some florals to the left and right of my photo as well as a pretty little cluster of banners and florals above the right-hand side of my photo.  I find this gives the eye three places to rest as it moves around the page and really rounds out the design.  Lastly, I added in the bow and the enamel dots and called it done.

Thanks for popping by today and if you haven’t already, click here to get your instant access the file.

Until next time,

error: