YOU ARE MY SUNSHINE | CUT TO YOU

Hi Creative Friends,

I’ve got some more inspiration to share with you today, this page created for CUT to YOU using a new favourite cut file of mine, “My Sunshine” featuring my Miss C from a few years back.  I love scrapping these older pics as they remind me of a time when she was so so little.  They grow up way too fast right!

As soon as I saw this pic, I knew I wanted to create a fun, Summer style layout, my photo was already printed in black and white, so I really wanted to bring in the tones of Summer in my scrapbook supplies.  I pulled out the Endless Summer collection from Cocoa Vanilla, I love the tones in this collection and now it’s a few years old, really wanted to use it up!

Yes, I am still on my “New Years cleaning binge” and am really focused on using my supplies.  So I decided to pull out a 12 x 12 stencil.  It’s been FOREVER since I used one of these!  First, I added some soft coral Lindy’s Stamp Gang mist using the packaging technique, then positioned my stencil over the top and very lightly misted with some Pastel Mint Ayeeda Mist from 13arts.  Once that was dry, I took some white thread and my sewing machine and stitched over the ‘sun rays’ for added detail and dimension.

I’m in total love with this colour combo!  Next up, it was time to select a cut file from my huge collection.  This one is a newer design and fit the theme of my page perfectly.  I misted it lightly with the 13arts spray as well… trying hard to make the spray light and consistent.  Once that was all dry, it was time to back the bottom part of the file; I decided on this warm wood grain pattern.

Here you can see a close up of the backed cut file and my soft mint mist.

I positioned the cut file onto my preprepared background with some foam tape.  Then, it was just a matter of matting and mounting the picture and then I locked that into position with some foam tape as well.  I love lifting the photo off of the background of my pages, the dimension is really lovely.

All that was left to do was add in my sweet Summer embellishments.  I’ve included some super cute fabric clouds from Charm Creations – another little Aussie business; Charm hand makes all of her embellishments and I love them!  I’ve also added in some butterflies from the Endless Summer sticker sheet, a paper flower and some wooden elements as well as a flair button to finish.

Here is the cut files I’ve used:


Thanks for popping by today, I really do appreciate your support.  I love seeing what you make too with the cut files, so please if you haven’t already, visit – CUT to YOU HQ for more inspiration from the design team and lovers of our files and show us your makes!

If you love a Summer themed layout, and are looking for more inspiration, you may also be interested in this recent blog post.

Until next time,


CHERISH | MORE THAN WORDS | GWEN WRUCK

Hi Creative Friends,

Happy Monday to you all!  I’m here today to share my latest project for Cocoa Vanilla Studios, this one featuring the More Than Words collection and a sweet black and white picture of Miss 10, pulled together with one of the latest release cut files from CUT to YOU called ‘Smell the Roses’.

The idea for this page started with the cut file.  I’m always quite ‘time poor’ at this time of year with the school holidays reaching their end and lots of preparations for the school year ahead happening. I knew, if I started with a cut file, a lot of the design work would be done for me and it would get the page done fast!  I simply uploaded the design into my Silhouette Studio software and arranged on my page and cut it out four times.  I had an idea to make a wreath of sorts from the roses.

I then went about backing the roses in the ‘Darling Buds‘, ‘Gossamer‘ and ‘Radiant‘ papers.  For consistency, I used the same paper combinations on two of the four roses.  Once that was all done, it was now just a matter of arranging them on my background paper.

I decided on a plain white background for this one, just for the clean look it provides.  At first, I tried to place them so that the entire design was on the page but it looked a little overwhelming, so I pushed the flowers out further and let the edge of each rose flow over the edge of the background cardstock and I just love how they look!  Time to glue them down and then I stitched around the edge and trimmed off the excess pattern paper.

It was now really easy to see where my photo should go; right in the centre!  I’ve matted with more of the pretty ‘Darling Buds‘ paper and added some more stitching.

Next, I wanted to lock in my title.  Ohh so many perfect choices from the ‘Chipboard Title Stickers’, I went with ‘Cherish’ and centred above my picture.  I’ve also found some die cut elements from the ‘Die Cut Ephemera‘ pack and created a small cluster in the top left-hand corner of my photo.

I wanted to add a few more small elements at the bottom of the photo to balance the design out so I made a cute paper bow out of a scrap of paper from the ‘Paper Pad’.  I chose a pattern from the paper pad as I really love their smaller scale for smaller elements like this.  I’ve also added here a sticker from the ‘Accessory Sticker sheet‘ and another title piece, this one is fussy cut from the ‘Love Always’ collection pattern paper ‘Lovely Things‘.  These elements finished off the page really nicely.

Thanks for popping by today, as always, I hope this inspires you to make something pretty! A reminder to share your creations over at the Cocoa Vanilla Studios Facebook group, we love seeing what you make and if you use one of the CUT to YOU cut files, be sure to share in the CUTtoYOU HQ facebook group too!

Until next time,

“Happy Days” for Scrap the Boys February 2019

Hi Creative Friends,

Super excited to share that CUT to YOU is sponsoring Scrap The Boys this month!  It’s been so fun to partner with the Design Team to not only design a set of cut files inspired by the mood board but also create a page to share with you all.  Here is the mood board…

I’ve designed a couple of cut files inspired by the mood board and they are both available right now:

and here is my layout!  I was super inspired by the colours and the wave/ocean theme to scrap this pic of hubby and me and the background cut file was perfect.  Now, I know technically it’s scrapping the boys and I’m in the pic, but when you’re the sponsor you get to bend the rules a little right?  Be sure to only include boys in your entry though for your chance to win! 🙂

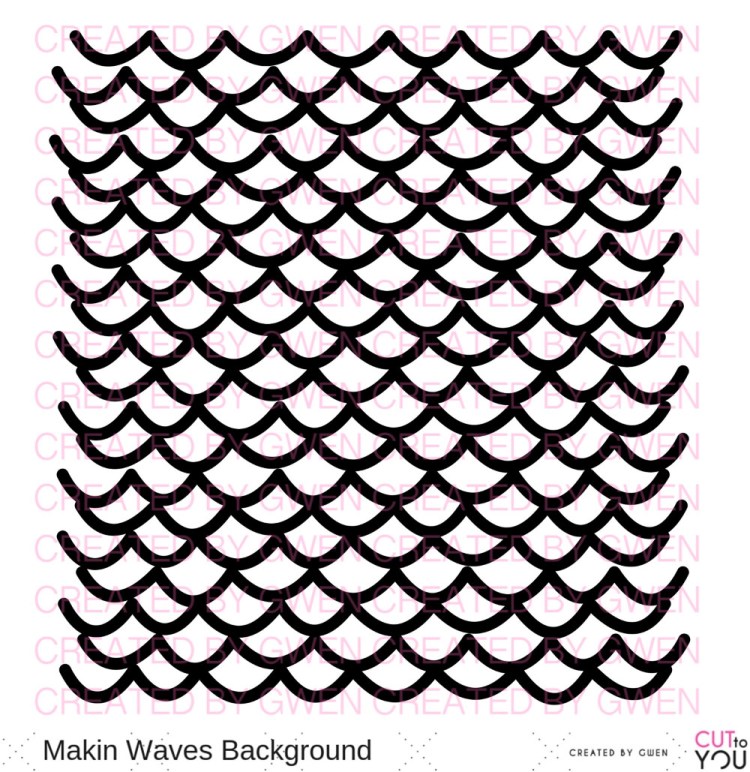
To begin the page, I pulled out the ‘Makin Waves’ Background cut file and my watercolours.  I just went with a couple of tones in blue and green and randomly coloured the file.  I didn’t cover with gesso or anything first as I knew I’d take it easy on the water and be careful with the file while it was wet!

Next, I pulled out the ‘Endless Summer‘ collection from Cocoa Vanilla.  This one is an older collection (from 2016).  I’ve also pulled out the Hello ‘Sunshine collection‘ (from 2015)and I really am in the stash busting mode at the moment so this was the perfect match for the cut file and my pic!

I matted the photo twice and mounted on foam to raise it above the background.  I’ve also added in my signature stitching.

Next up, it was time to add in some fun summer elements.  These are from the die cut ephemera packs and Accessory sticker packs.  There are also some super cute puffy stickers which surprisingly you can still get in store here and the fancy buttons from this collection are also still available here.

A cute little flower cluster and flair button and the page is done.

It was so fun to play along with Scrap The Boys this month and I’m super proud to be able to sponsor this great Aussie challenge blog so I do hope you get your entries in!

Lastly, a quick reminder that our Facebook group – CUT to YOU HQ has more inspiration from the design team and lovers of our files so be sure to join us 🙂

Until next time,


“Happiness is Here” for Scrap the Girls February 2019

Hi Creative Friends,

February is here and it’s time to share another fab challenge at Scrap the Girls.  This month we are being inspired by a “Constance Hall” themed mood board.

I just adore the colours in this one and all of those florals; so so pretty!  Constance is a proud Mumma bear so it seemed fitting to scrap a pic of myself and my Miss 11.  Here is my take:

I began the page by pulling out some water-colours that matched the Yellow, Orange, Pink and Blue panels in the mood board. Then, with a general idea of the design for my page, went about adding them in blocks using the packaging technique.  Once that was dry, I then added splatters over the top.  I made sure to keep the colours in sections and not to mix them up too much to avoid things getting muddy and messy!

Next, I pulled out a couple of packs of the Celebration Flowers cut files, these are the exact size you will receive them if you order as CUSTOM cuts.  I then went about colouring each of them in the same four colours as above… the main idea for this page was to create a large cluster for my photo mat with layers of the feature colours in the mood board.

Once I was happy with the colours on the cut files, I positioned them onto my page.  Next, I mounted my photo.  I went with a black and white photo for this page as I knew I already had a lot of colour going on and didn’t want it all to get too much.  I love the pop of the Black and White with the bold colours so much!

With the position of the photo and the cut files now locked in, it was time to add the smaller embellishments to finish out the page.  I’ve kept with the colour blocking adding yellow elements in the yellow section, orange elements in the orange section and so on.

I’ve also added paper flowers in the coordinating colours and love the dimension they add.

Above, you can see the blue section, I even managed to find some blue butterflies!

To finish the page out, I added buttons from my stash in the same co-ordinating colours. I then trimmed the edges and mounted onto a piece of pale pink cardstock and sewed around the edge.  I add a frame in this way to most of my pages, I just love how it finishes them off.

Be sure to upload to the Facebook group for your chance to win a fab prize from this months sponsor.

This month’s sponsor: Corbett Creations & Cocoa Vanilla Studio

Until next time,


BLOOM AND GROW | GWEN WRUCK | MIXED

Hi Creative Friends,

Here today to share my latest project for Cocoa Vanilla Studios.  With the start of the new year, I’ve been in a bit of a ‘stash busting’ mood; I love a good craft room tidy and using up some of my older supplies to make way for some pretty new things!  I find this even easier to do with a fresh new cut file, this one is from CUTtoYOU called Spring Floral.

I started by choosing the background paper; this one is Line Up from the Totally Rad collection.  It’s one of the very last pieces of paper I have in this line and although it is a ‘boys’ collection, I have loved teaming it with my other supplies to make both masculine and feminine pages.

Next, I went about backing the cut file.  I’ve gone through and found some coordinating scraps:

Wild At Heart Double Dot and Luscious pattern paper and Love Always Lovely Things pattern paper as well as the black and white spot from the More Than Words 6×6 Paper Pad.  I simply alternated the designs for each flower making sure no flowers that were next to each other had the same pattern paper backing.  Once everything was backed, I’ve positioned the cut file onto the background of my page.

For my photo, I’ve stitched around the edge and then mounted onto another piece of the black and white paper from the More than Words 6×6 paper pad.  I’ve also added some foam behind it for added dimension and added to my page.

I’ve really now got the bones of the page sorted, time for some pretty details.  I’ve pulled out the Wild at Heart Die Cut Ephemera pack and found some pretty leaf die cuts to add.  I’ve also added in a stack of buttons from my stash which I’ve hand sewn on for added detail.

Next up, I wanted to lock in the title for the page, so I’ve pulled the Wood Veneer Words from the Wild At Heart Collection.  I’ve used the word “grow” and some of the pretty wooden hearts.  For an extra detail I’ve covered them with Gold embossing enamel and heat set, the wood texture of the these takes on the embossing very well and I love the end result.  I’ve teamed this with some plain white Thickers from my stash to make the title “Bloom and Grow”.  The photo is a selfie taken at a school event raising awareness for Mental health, and it’s a topic I’m really passionate about!  2018 was a year of self-discovery for me so I really wanted this page to celebrate that!

The page was almost complete at this point.  I just wanted to add a few little butterflies to round out the design.  These are from the ‘Patchwork‘ paper from the Wild At Heart collection.  I’ve simply fussy cut them out and added to my page with foam tape.

Here you can see the gorgeous shine of the embossing powder on the wood elements.

Thanks for popping by today, I hope you are all getting a creative start to the year.  Maybe this has inspired you to use up some of your stash to make room for the exciting new things 2019 will bring! If it has, be sure to share them over at the Cocoa Vanilla Studios Facebook group, we love seeing what you make.

Until next time,

error: