HAPPY DAYS | MIDNIGHT | GWENWRUCK

Hi Creative Friends,

Here today to share my first Cocoa Vanilla Studios project for the year.  I feel so so grateful to be on the Design Team again for 2019 and can’t wait to share lots more projects with you!  This layout is another with the beautiful ‘Midnight’ collection and it’s featuring my cat, Ferris again.  He’s been in a few pages of late and I love that because he is a big part of our family.

Some of you may recall that my cat is a boy, so usually, I’d go for a page that wasn’t too girly and full of florals, however, this page I’ve gone all out with the pretty vibe starting with the ‘Wings‘ digital cut file from CUT to YOU.  I cut the file out three times, flipping the design for one of them, getting them sized to fit the design I had in mind for my page in my software before cutting them out.  Once cut, I added some pretty watercolour paints, these ones are from Prima which I purchase here.  I find that as long as you are careful with the amount of water you use, the regular cardstock paper is fine for this.  You could cut them out in the watercolour paper too.

Once all of my butterflies were dry, I positioned onto my page and stitched down along the centres for added detail.  I’ve chosen the ‘Sophisticated’ paper for my background, I love the soft pink stripes in this one, they provide a lovely neutral background.  Next, it was time to mount my photo, sticking with the stripes theme, I’ve chosen the ‘Bloom & Grow’ paper for this, I wanted to add some of that striking Navy as accents to my page so the photo mat was the perfect place to start.  It also helps the photo stand out off of the background.

Next, I knew I had to add my title.  The ‘Cardstock Titles’ in this collection are quite large so it’s important to sort out the position of the title before adding in lots of other embellishments.  I find that if I don’t set the title early in the design I run out of space for it!  I decided to go with a large cluster above my photo (which the title would be the main part) and a smaller one on the left-hand side of the page.

Here you can see I’ve added foam behind the word “Happy” and then left the word “Days” flat against my background.  This is the beauty of these Cardstock titles over chipboard ones; if you want dimension you can add it; if not, you can use them as they are from the pack.

To finish out my clusters, I’ve added in elements from the ‘Die Cut Ephemera’ pack and the ‘Accessory Sticker’ sheet.  I’ve also added two of the small hearts from the ‘Chipboard Pieces’ pack and a flair button.  I’ve mounted some of the stickers with foam for added dimension.

To finish out the page, I went through my stash and found these black sparkly enamel dots from the Love Always collection, yes, I’m mixing the navy of the collection with the black enamels but my photo is black and white and the Navy is quite a dark shade so I’m calling it good.

Thanks for popping by today, I hope you are all getting stuck into your creative projects this year, getting those stories documented and having a heap of fun in the process.

Until next time,

“Lovely” for Scrap the Girls January 2019

Hi Creative Friends,

Happy 1st of Jan 2019!! A new year and a fresh start, got to love that!  I have so much planned for this year ahead, starting by sponsoring this month challenge at Scrap the Girls.   I hope you’ll join me in this year’s adventure!  This month, we have this fun inspiration board to work with and I’m excited to share my take.

I love the Black and White theme to this one and that POP of Red is so fun…..I thought it would be a great chance to scrap another Christmas photo (this one from 2017) Here is my take!

I began the page with my photo and the Intersecting Hearts Digital cut file from my store CUT to YOU.  I cut this one out as large as I could to fill up the background of my page.  I then pulled out a stack of bits and pieces from my stash that were either Red, White or Black.  I really wanted to use up some of those one-off pieces in my stash and these challenges are a fab way to do that!

Next, I went about backing the cut file, I used only scraps of paper to do this, so mixed up some red cardstock, some red and white vellum and some black and white stripes.  You’ll see I haven’t backed all of the hearts, I didn’t have enough scraps to do each one, but I love how some are white on white.  You really can work with what you’ve got; the cut files really do help you STRETCH your stash.

I then grabbed another red piece of scrap paper and combined that with a red paint sample card and began to build my photo mat.  Before I stuck it down, I decided to use the cute squiggle chipboard pieces as I felt they really matched the circular pattern in the hearts.  I’ve painted them black and then layered on top of the cut file.  I love how it’s an extra layer of detail.  I also found a couple of puffy stickers in a similar design so, on they went as well.

It was now time to position my photo.  One locked in, I could add some more embellishments, a black and white chipboard piece and this cute black and white bow from Crate Paper.

Here you can see all the pretty layers of the page.  Loving how this is coming together.

I then went about adding in some title pieces, I started with the larger banner piece that says ‘Lovely’.  It was the perfect colours so I just had to include it.  I also had this chipboard piece below and some really old DYMO style stickers.  I’ve had those for years now, so it felt great to get them on a page!

To finish the page out, I’ve added some enamel dots; the perfect finishing touch.

Be sure to upload to the Facebook group for your chance to win a fab prize from this months sponsor which is my store CUT to YOU.  We love seeing what you make and you can win a Custom Cut or Digital prize pack.

This month’s sponsor: CUT to YOU – Created by Gwen

Until next time,


HAPPY CHRISTMAS | CUT TO YOU

Hi Creative Friends,

Wishing you all a wonderful Christmas Eve, Eve!!!  I have one last share for you for the year before we get into Christmas week and all the magic of this busy season.  I have a huge week planned, so you might notice we are a little quite on Social media, not to worry, I have an even bigger 2019 planned and you’ll hear more about all of that soon!  The website will be open all Christmas however, there will be some small delays in shipping with all orders being shipped in the New Year.

Now, onto my layout! I may have mentioned before, I only tend to scrap Christmas during December, so today’s share is another Christmas layout, this time using one of our latest Christmas designs “Stacked Presents Background“.  This is one of my favourites from the latest release.

Here is the cut files I’ve used:

The idea for the design of the page was inspired by the cut file, this is why I love working with them so much!  I knew I wanted to cut it out quite large and it would really create the ‘framework’ for the page, all I had to do was back the shapes and add my photo!  If you order this one as a CUSTOM cut, this is the size it will be for you too!

I decided on the ‘Tis the Season‘ collection by Cocoa Vanilla Studios, it is a Christmas collection, however, I really only have the papers that are quite generic and could be used for lots of things.  I love the softness of this collection, it’s so versatile.  I also had a very small scrap piece of Black and White paper from the ‘Colour Me Happy‘ collection which I’ve also used.


Once the cut file was backed with my papers, I positioned it onto a white background.  I was looking for a clean look for this page and I do love the ‘white on white’ look.  I then took some time to add stitching to all of the presents in the stack.  I find these small details really add to the page.

Next, I matted my photo, again in a scrap from the Christmas collection, stitched around the edge and position on my page.  I’ve mounted with foam tape as well just for some dimension and to separate it a little from the background.

Now came the fun bit, adding all the embellishments!  I’ve gone with some stickers and die cuts here and there from the collection; not too much as I didn’t want to cover up my beautiful cut file!  I also found a couple of bows to add to my present stack, I love how cute these are!  You can see below that I’ve added some Holly too as a little gift decoration and a banner at the top of the page that says “Christmas Day”.

To finish off the page, I’ve added in some Enamel dots, also from the ‘Tis the Season’ collection.  They fill in some gaps, add some detail and helps draw the eye around the page.  It’s a pretty simple and clean design, and I love how it worked out.

Thanks for popping by today, I hope this has inspired you to get some Christmas scrapbooking done and I’ve left links to everything so if you’d like to re-create this page you can gather the supplies you will need.

Also, a reminder to join our Facebook group (if you haven’t already) – CUT to YOU HQ for more inspiration from the design team and lovers of our files.  I’m also having giveaways over there, so if you like free stuff, pop on by.

Until next time,


2018 FAVOURITES | COCOA VANILLA STUDIO

Hi Creative Friends,

I hope you are all well!  I’m back on the blog today with my last share for Cocoa Vanilla Studios for the year.  This week the design team are featuring our favourite layouts for 2018.

I so love all of the pages I created this year, it really is hard to choose but I couldn’t go past this layout of my sister and her pooch!  I created this page as a gift for her 40th birthday using the “Totally Rad” collection and I just love how it turned out… the soft tones I pulled from this collection still make me swoon and set off this cute pic beautifully.

My second choice is “Cherish the Challenge” created using a mix of collections.  I love mixing and matching collections and just love how they all work together so well.  I simply went through my stash to find anything that was either Black, White or light pink and mixed them together for this page.  I chose this page as it documents a huge part of my 2018 (and long-term goal), of being en-pointe.   Ballet is a big part of my life and makes my heart so happy, I had to include a layout devoted to it in my favourites.  I’ve also included this one as it features one of my very own designed cut files, another new adventure for this year which I’m really proud of.

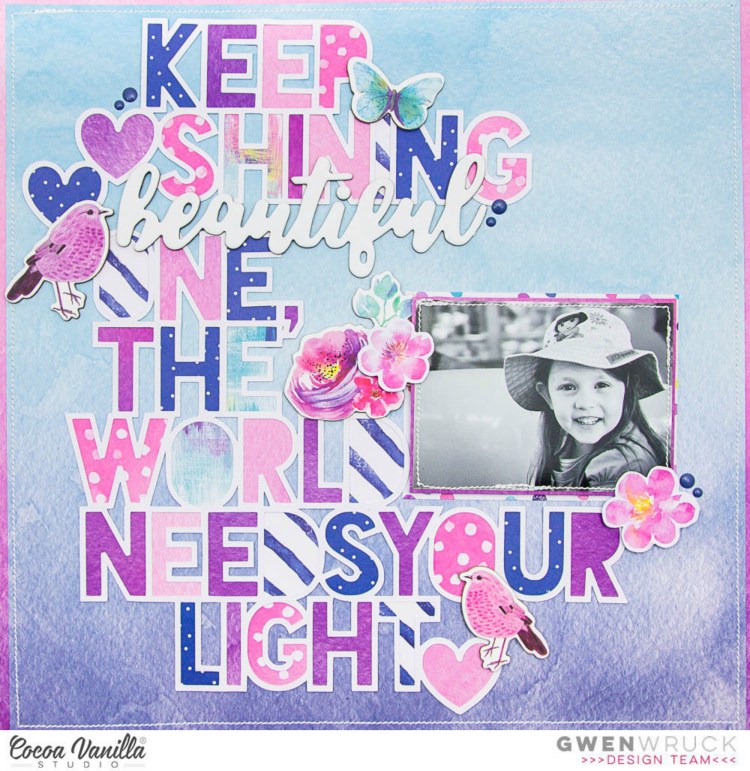
Lastly, I’ve included this layout “Keep Shining”.  I couldn’t help but put this in as it features my all-time favourite collection “Bohemian Dream“.  The colours in this collection will never get old for me even after using it on a stack of layouts.  For this one, I set about using up some of the smaller scraps I had; not wanting to throw any of it out!  I’ve backed this cut file (CUT to YOU) mixing and matching all of the patterns to create this bright and happy page.

Thanks for popping by today, and for your support both here and on the Cocoa Vanilla Studios blog.  I wish you all a very Merry Christmas!  It has been such a fun year and I’m super excited to be able to share more Cocoa Vanilla Studios inspiration with you in 2019.

Until next time,

CHRISTMAS MEMORIES | CUT TO YOU

Hi Creative Friends,

Happy Monday to you all!  Here today to share a new layout with you and it’s well and truly the time I got my Christmas on!  I am a huge Christmas fan and am pretty excited that it’s only around 2 weeks away and I’ve really only just started scrapping with last years photos!

Here are the two cut files I’ve used:


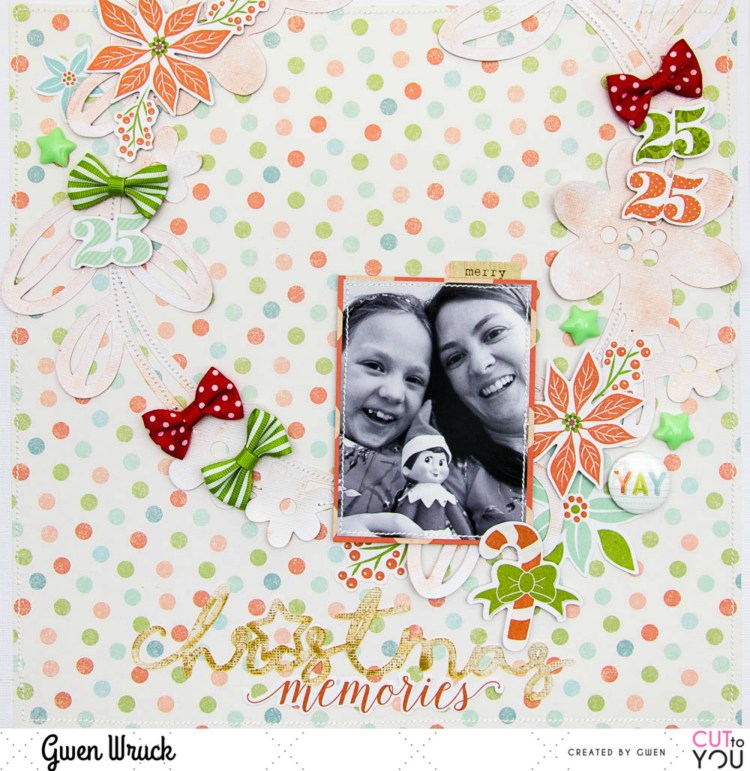
The idea for the design of the page was inspired by the Floral Wreath Background cut file.  Whilst it’s not a ‘Christmas’ design as such, it lends itself very well to a Christmas wreath.  I decided to run it off the page rather than have it centred for something different.  At this point, I had chosen the photo I wanted to work with and as it is on the smaller size, it worked in perfectly with the proportions of the wreath.

Cut files and page layout decided I knew I wanted to add some sparkle.  I’ve used Shimmers to colour the wreath and page title.  I haven’t gone to town here, just adding a little with the packaging technique to soften the white of the cut files.  I’ve then added the wreath to my page and stitched into position with my sewing machine.  This technique is a really good way to work with the files if you are short on time or don’t feel like investing the time and effort to back them.

Now comes the fun part!  I’ve decided to use the beautiful ‘Tis the Season‘ collection by Cocoa Vanilla Studios. Sure, it’s from 2015 but I absolutely love the muted colours in the collection.  I’ve matted my photo and added a stitched border to highlight.  I’ve then gone through the elements of the collection and added them to my wreath.

I’ve focussed a cluster to the bottom right of my photo and to the top left corner of the layout to draw your eyes toward the photo and balance out the design.  I’ve then added my title to the bottom centre of the page along with a die cut title from the collection.  This finished out the page and I think it’s the sweetest thing ever.

New to CUT to YOU? – All of my designs are available as downloadable digital cut files as well as Custom cut files for those ladies who don’t own a Silhouette or alternative die cutting machine.  I will personally cut them for you at HQ and ship.  I have over 100 designs now so lots to see in the store, visit www.createdbygwen.com.au for more info.

Join our Facebook group – CUT to YOU HQ for more inspiration from the design team and lovers of our files.

Until next time,

error: