“My Cute Girl” for Colour Blast

Hi Creative Friends,

Super excited that it is my turn on the Colour Blast blog today to share this months Challenge!  I love how the girls have put together a challenge each month to help us get inspired, use our Colour Blast products and maybe even win some more!  It is my turn to kick off the month by sharing my take! Can you guess what the challenge is?

If you guessed, “be inspired by a Rainbow”… you were right!


To start my page, I began by choosing a Rainbow of Colour Shimmer Sprays to work with.  I went with Lipstick (Red), Sunshine (Yellow), Blush (Pink), Envy (Green), Lovely Lilac (Purple), Sienna (Orange) and Singin the Blues (Blue) – Don’t they look pretty all lined up like that!

I then used the packaging technique to lay down each colour along the left-hand edge of my page.  I worked my way through the rainbow making sure each colour was dry before applying the next.

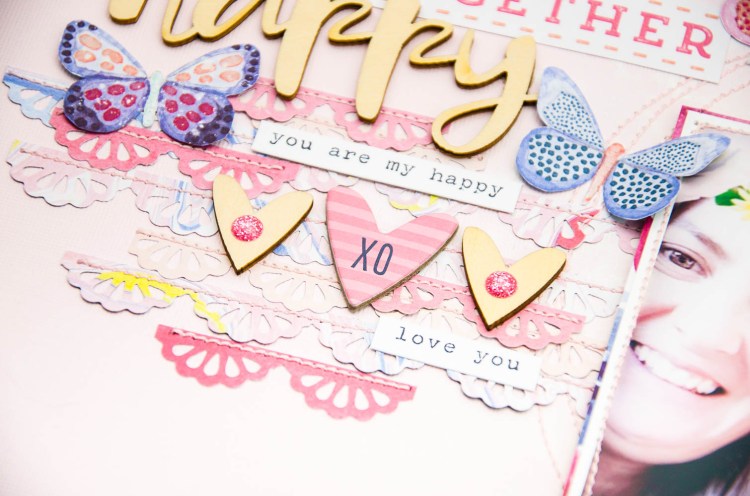
I then began working through my stash to find coordinating papers to match my sprays.  I started with my scraps which I punched with an edge punch to create lots of paper strips.  Again, working with all of the colours of the rainbow, I laid them down on my page, this time towards the right-hand side.  The spray and these paper scraps acted as the background for my page.

Above you can see a close up of the pretty colours in the sprays.  I love how applying them using this technique gives you a watercolour type look.  Once I was happy with the placement of the paper strips, I stitched them all down.  Next, I matt my photo with a colourful pattern paper and positioned that.

Now it was time to go through my alphabet stash.  I pulled out a heap of letters in coordinating colours to match my rainbow.  Some are chipboard word pieces such as the word “my” and “cute” and others are from alphabet sticker packs such as “sweet”.  I simply looked for words and letters that would match the colour of the sprays I had used.

Now that I had my photo and words all locked in, it was time to add my embellishments.  Again, I’ve stuck with the ‘Colour on Colour’ look searching for bits and pieces to match the Colour Shimmer sprays.

Where I didn’t have a pre-made embellishment to match, I made my own, such as the paper bow above created with a die cut through my Sizzix machine.

To finish the page, I went through my Enamel Dot collection and found some in each of the colours to add.  I know there are a lot of elements on this page, but I think I get away with it because they have been placed tone on tone and I just love how it turned out.

I give this project a “mess level” of Low.  Very little mess, super easy technique that I would recommend for a beginner.

Thanks for popping by today, the challenge runs all month, so I hope this page inspires you to pull out your Colour Shimmer Sprays and create your very own Rainbow!  As always, be sure to share your creations, I really love seeing what you all make and you could win yourself some free product – who doesn’t love that!

Until next time,

Gwen

xox


“Oh So LOVED” for Art and Soul Studio

Hi Creative Friends!

I’m back on the blog today to share Part Two of my guest designing spot for Annette at Art and Soul Studio using the DIVINE Creative Devotion line by American Crafts.  Today I wanted to share with you a traditional Scrapbook page I created using pieces from the collection mixed with some more traditional scrapbook supplies, those from the Maggie Holmes Carousel collection.

I started the page with one of my all-time favourite cut files.  I backed it with the delicate paper from the Vellum Scripture Pad.  It is so soft and pretty, perfect for the look I was going for.  Next, I stitched around the edge to secure everything down.  I then grabbed some white cardstock from my stash and the Maggie Holmes Carousel paper pad and mounted my photo, I’ve also added into my photo mat another piece of vellum from the Scripture Pad as well as some elements from sticker sheet which I have stuck on a scrap of white cardstock and fussy cut-out.  There were just enough little pieces to add a small amount of interest on the bottom right-hand side.  I also added a Suede Tassle here and a Metal Binder Clip.

To create my title, I cut out the large letters from the Jen Hadfield Heart of Home paper “Climbing Ivy” paper and sewed around their edges.  I then mounted them on foam and centred them at the bottom of my page.  I teamed these with the Thicker Stickers from the collection, that pop of gold is DIVINE!

Next, I placed my photo mat also on foam, slightly to the right of my title and now it was time to embellish.  I began with elements from the Maggie Holmes Carousel Chipboard Stickers including the sweet little banner I placed above my tile and the flags I placed on the left of my photo.

I’ve also added elements from the Puffy Thicker Stickers sheet such as the cute bow at the bottom of my flags shown below.

To highlight the hearts in my background, I added in some from the Puffy Stickers and the Chipboard sheet, I love how they look shape within shape scattered around the page.  Lastly, I took 3 of the sentiments from the Creative Devotion Sticker sheet and mounted them on White Cardstock (Beautiful, Grateful and Amen) and placed these on my page to finish off the layout.  There you have it, so even if this collection is not something you would normally go for because you are not a Bible journaler, you can use elements from it for traditional scrapbooking, just by adding a few things from your stash.  I love how these turned out and I hope it inspires you to take a look at this collection because it really is stunning.

Items used:

Metal Binder Clips

Vellum Scripture Pad

Suede Tassles

Maggie Holmes Carousel paper pad

Maggie Holmes Thicker Stickers

Banner Clips

Puffy Thicker Stickers

Jen Hadfield Heart of Home paper “Climbing Ivy”

Until next time,

Gwen

xo

Happy Together | WILD AT HEART | Masters Layout

Hi Everyone,

A special share today!  As you know I was a Scrapbooking Memories Master for 2017!  As part of my prize, the wonderful Zoe from Cocoa Vanilla Studios sent me a huge prize pack of the Wild At Heart Collection.  I was to create a layout for the magazine featuring these beautiful products.  As fate turned out the magazine never went to print with this issue, my layout was never shared and the magazine went out of publication. However, I love it so much and as part of the design team as well for Cocoa Vanilla I am now able to share it as part of a blog post on their blog featuring all the Masters and their layouts.

The design for the page began with a clean baby pink background which I applied white acrylic paint to using the packaging technique.  Once dry, I traced a circle 6 inches in diameter and stitched around it a few times for detail.  I then went about cutting some very thin paper strips and running them through an edge punch.  I have used this technique a few times before and always love the result.

I placed these down in layers and stitched in place.  Next, I went about adding my photo mat, I’ve used the MOMENTO paper which is quite a bold design, but used in a small amount was perfect for my page.

Now was the time for embellishing!  I created my title using a combination of pieces from the Rubber Charms, elements from the FUSSY CUTS paper, and a Wood Veneer word.  I’ve also added extra words from the Accessory Sticker sheet and some fussy cut butterflies from the MARIPOSA paper.

I’ve added some more Wood Veneer and some of the Sparkles – Enamel Dots to finish the layout and it was done.

Be sure to pop by the Cocoa Vanilla Studios blog this week to see what the other Masters created with this collection for their Masters Task.  You will be surprised at the variety of projects they are made with the same collection!

Until next time,

Gwen

xo

“Be Still and Know” for Art and Soul Studio

Hi Creative Friends!

I hope you are all doing super well!  Here today to share a wonderful and unique opportunity I had this month to create for Annette at Art and Soul Studio using the DIVINE Creative Devotion line by American Crafts.  It was so nice to be thought of and asked to create with this collection and I am super excited to share a Bible journalling page and coordinating Travellers Binder notebook page (where I will do my verse study notes) with you all!

I immediately fell in love with the sticker sheet from the collection which has a stack of Bible Verses included and this one from Psalm 46:10 stood out.

These stickers are on a sheer background so they are perfect for using in your Bible as you can see through them.  For my Journal page, I mounted the sticker on to a scrap piece of white paper and fussy cut it out.

It was at this point I thought to add a bit of background work first.  So I took a sheet from the Vellum Scripture Pad and added some smudges of colour to it using the Gel Crayons.  It already had some colour, so I just added a little extra in a similar style.  I then attached this piece to my Journal using some washi from my stash and sewed around the edge with my sewing machine.

Next, I added the fussy cut “Be Still” element and the “&” sticker from the sticker sheet, I fussy cut this one out on white cardstock as well, just to make it stand out.  The cute little enamel heart you see here is from the Cocoa Vanilla and you can get them here.  I added “KNOW” using Maggie Holmes Thicker Stickers which are the most divine and perfect shade of gold and white, so that made my title “Be Still and Know” – I wanted to remind myself “Be Still and Know”, He is God, He has great plans for me and that I don’t need to be the one to sort everything out, in fact, I can be still and know what he will make a way even when there feels like no way.

So here is the right-hand side of the Journal page – I’ve used the packaging technique here and the crayon to lay down some colour for my background.  I have to add here that I love love love these crayons, they are so soft and buttery to use and the colour is so nice!!  They also do NOT bleed through on the bible, so they are perfect!  Next, I added a triangular piece of the Vellum Scripture pad in the corner in the same way as I did on the left. I added the cute stickers from the sticker sheet and my tile was simply cut using my Silhouette.  I also added here one of the Suede Tassles, I love how they finished off my page and poke out of the side of my Journal.  You can also see the Metal Binder Clips I added, these are really great for marking a page or clipping things in your Journal or Bible, love these as well!

Now, onto the bible journalling.  First up, I wanted to bring in some of the colours from my Journal so I just rubbed the crayon straight onto my page and smudged with my finger.  The colours are so soft and I love them!  I also highlighted the verse and I love how you can still very easily read the text underneath.  I am not a fan of covering any text when I create in my Bible.  I added the “Read, Pray, Repeat” sticker straight onto my page as well as the cross sticker on top of that, you can see the edge in the photo above and how transparent they are.  I also added one of the Cocoa Vanilla Enamel dots here too.

On the left I added the full scripture again, I found these cute Bible Journalling templates – not an affiliate, just found them and thought that you might like them!  I simply coloured it with the crayons and added the Enamel heart, and cross sticker to finish it off.  It’s a simple page but that’s how I like to keep things in my Bible, yes the art is fun, but it is all about the word for me!

and there you have it.  I love how these turned out and if you are inclined, I hope it inspires you to take a look at this verse and get creative in your Bible.

Items used:

Travellers Binder Journal Notebook

Gel Crayons

Metal Binder Clips

Vellum Scripture Pad

Suede Tassles

Stay tuned, I have also created a regular 12×12 Scrapbook page with this collection which will be coming up on the blog soon.

Until next time,

Gwen

xo


EIGHT | MAKE A WISH | GWEN WRUCK

Hi Creative Friends,

I hope you are all well! It’s time for a new share for Cocoa Vanilla studios today and this one uses one of my all-time favourite collections – Make A Wish.  Whilst it’s a collection that you could scrap anything with, it is absolutely perfect for documenting birthday celebrations, so I thought why not create a page that celebrates my little Miss turning 8.

The design for the page was actually dictated by the fact that I have almost run out of paper for this collection.  I have quite a few embellishments left but not a lot of the paper, so I immediately thought to use a grid design, it’s a really great way to use up scraps.  I began by cutting 3×3 square pieces from the leftovers overs of the Party Dots, Loot Bag, Fresh Cut and Hip Hooray papers.  For added softness, I mounted these onto a piece of vellum from my stash.

Next, I found a few extra pieces that were large enough to mount my photo, I’ve used Loot Bag and Fresh Cut. I positioned it towards the left hand side of my page. Next, I went to the cut apart sheet Party Mix and fussy cut out the banner and birthday cake.  The fussy cut sheets are a must-have in any collection as you get oh so many elements for a great price!

To balance out my design, I decided to embellish just 2 of the squares in my grid, those towards the right hand side of the page.  To highlight these, I’ve used 2 of the frames from the Chipboard accent stickers pack.  I’ve then added the fussy cut birthday cake on top which I mounted with foam tape for dimension.

I’ve also added here elements from the Die Cut Ephemera, and more chipboard as well as a Flair Button and Enamel Dots.

For the 2nd square, I’ve used more Chipboard accent stickers and more from the Die Cut Ephemera pack.  I also found a few small wood veneer elements which don’t belong to a specific collection, Zoe had these for sale at the June Scrapbook Expo last year as little grab bags and I couldn’t resist getting a couple.

Lastly,  added another smaller cluster to the top left hand corner of my photo, this time also adding in some Bitty Blooms, I had almost forgotten about these cuties!   Then, looking at the layout I thought it was very ‘top heavy’, so I went and added in a couple more pieces from the Die Cut Ephemera pack as well as my title ‘eight’, which I have created using Thickers from my stash and that balanced things out nicely.

Thanks for popping by today, it was really fun to play with an older collection and I love how fun this one turned out.  Stay tuned as I have a heap of new projects coming up using the newest collection “More than Words” that I know you are going to love!

Until next time,

Gwen

xo

Gwen

error: